Welcome

Hello and welcome to my blog of card crafts. I am happy that you stopped by for a visit. I hope you can visit often. Have a wonderful and blessed day! "I will praise thee; for I am fearfully and wonderfully made: marvelous are thy works; and my soul knows right well." Psalm 139:14

Monday, July 30, 2012

Technique Tuesday -- Soot Stamping

Technique Tuesday on the Sparkle N Sprinkle blog


Boy do these Tuesdays fly by! I hope you are having a good week.  I don't know about you, but the heat and humidity came back to my neck of the woods and I am looking forward to Fall! This technique is perfect for a Fall card, so I made one.  I have heard of soot stamping for many years, but I have never tried it. I just love the look of this technique and I hope you do too.


Supplies needed:

  1. multi-colored ink pad
  2. sponges
  3. glossy cardstock
  4. candle
  5. sealer spray
  6. something to hold card over flame ( I used needle nosed pliers )
Take the sponge and choose colors from the multi-colored ink pad and sponge color onto the glossy cardstock. I started with lighter colors to darker colors. You can also use individual ink pads.


When the cardstock is completely covered with ink, light the candle and turn the cardstock upside down over the candle using the needle nosed pliers to hold it with. Keep it very close to the flame, moving it around quickly. The cardstock will start to turn black.


Keep running the card over the flame quickly until most of it is black.  Be careful because the edges can catch fire! Believe me, I KNOW!!!! LOL! Now take your uninked stamps and stamp onto the blackened cardstock. The stamps will take off the soot and leave an imprint.

You will definitely have to use sealer spray to seal your card because the soot will rub off easily. Don't you just love the look of this? I went crazy and made a bunch of backgrounds. I hope you enjoy this as much as I did. Have a great week and thanks for stopping by!

April

Sparkle N Sprinkle supplies used:
  1. Celestial glitter
  2. Swirly Maple
  3. Loveliest Smile


Thursday, July 26, 2012

Sparkle N Sprinkle Blog Hop

Hi Everyone! I hope you will have a good weekend. It has been very hot here again. I will be staying in where it is cool! We are having another blog hop called Our Furry Friends, at Sparkle N Sprinkle next week, August 2-3. I hope to see you participating. We will be giving away some fun prizes. Come join the fun!

Tuesday, July 24, 2012

Technique Tuesday -- Alcohol Inks Grid


Welcome to Sparkle N Sprinkle Technique Tuesday! I hope you are enjoying your day.  First of all I want to introduce to you the new digital stamps by Michelle Perke. On this card I used Woofie. Isn't he cute?  What is great about the digitals is that you can make them the size you want. On this card I used a large and small Woofie.


Supplies needed:

  1. 3-4 colors of alcohol inks, you can also use dye reinkers
  2. glossy cardstock
  3. sponge
I used 4 colors of alcohol inks -- yellow, blue, red and orange

Take your sponge and squeeze a small line of ink on it, making a line of ink of each color side by side on the sponge.

Now take the sponge and swipe it down the cardstock several times. It is funny how mistakes can be good sometimes. I was supposed to use the glossy side of the glossy cardstock, but I was in a hurry and used the matte side of the cardstock! It turned out great and I like it better. Using the glossy side made the ink pool on the edges of the cardstock. I also tried just regular cardstock and the ink soaked in too much and would not streak.


Turn the cardstock around, add more ink in lines on the sponge and streak down several times again. Now you have a grid.


I then printed the Woofie digital stamp onto the grid cardstock and cut him out!  This is easy and fun. I hope you will give this technique a try. Have a wonderful and blessed day!

April

Sparkle N Sprinkle supplies used:
  1. Woofie
  2. Dogs Leave Paw Prints
  3. Twinkling Clouds Sparkle N Soft

Friday, July 20, 2012

Dragonfly Dreams

Hi Everyone! I hope you are having a good day. I have been doing some challenges on the Two Peas in a Bucket board. I combined two challenges which are  -- a color challenge, aqua and peach plus a dragonfly image and a pre- olympic challenge where we needed to use 5 circles. At Top Tip Tuesday they also want to see circles for their challenge. My tip is this -- I wanted certain patterns from my patterned paper to show on the circles I punched, so I just flipped my circle punch over to see where I needed to punch. I used the dragonfly from the new Nature 467 set at Sparkle N Sprinkle. Thank you for stopping by. Have a wonderful weekend!


Thursday, July 19, 2012

Another New Release

Here is another new release from Sparkle N Sprinkle! This is such a fun little stampet set! Aren't these cute panda cubs? I cut thin strips from a paint sample card for the "bamboo" in the window. I used Sparkling Snow glitter on the pandas' fur. I hope you are having a good day. Thanks for stopping by.


Wednesday, July 18, 2012

New Release!

Hello. I hope you are having a good week and are keeping cool! I want to share a new release today from Sparkle N Sprinkle. I really enjoyed using this Nature 467 set. For my first card I made a window card so that you can see the mushrooms through the window. I love making this type of card.

This is the card closed.


Here is the inside.


Here is another card I made with the set.


Thank you so much for stopping by. Have a wonderful week!

Sparkle N Sprinkle supplies used:
1. Celestial glitter
2. Waterscape glitter
3. Lemonade glitter

Entered in Simon Says challenge No Rules!

Monday, July 16, 2012

Technique Tuesday -- Making a Scene


Hi and welcome back to Technique Tuesday at Sparkle N Sprinkle. Today I will be making a scene, but not THAT kind of scene! LOL!  Hopefully you are keeping cool since it has warmed up once again.


Supplies needed:
  1. yellow, orange ,blue, purple and black ink pads
  2. sponges
  3. white or cream cardstock
Start with your lightest color -- yellow and start sponging on the color at the top of the card. Next sponge on the orange color.


I went back and sponged some yellow down the center to reflect the light in the water that I will be sponging, and then I sponged on the blue ink.


Then I used purple.


And last I sponged black around the edges to frame it and help the colors to pop.


I wanted a sun on my card,  so I used a circle punch and sponged yellow and orange on it to add to the sky.  I hope you enjoyed the technique today. Thanks for stopping by. Have a great week and I hope you stop by again next week!

April

Sparkle N Sprinkle supplies used:
  1. Celestial glitter
  2. Dani Reading
  3. Palm Hammock
  4. Flip Flops
  5. Life is Sweet

Saturday, July 14, 2012

Blog Hop Winners!

Thank you to all who participated in the Sparkle N Sprinkle blog hop. Here are the winners!


Please contact brenda@sparklensprinkle.com as soon as possible with your selections, your full name, address, e-mail & phone number..
Grand Prize #1
Debi
Your choice of any stamp set on cling cushion
Grand Prize #2
Rhonda Miller
Your choice of any Stampette set on cling cushion
1st Place
From April’s Blog
Dianne Potter
Any 2 glitter tinsels
2nd Place
From Shona’s blog
Auntie Em
Any 3 glitters
3rd Place
from Karin’s blog
Babe O
any 3 embossing powders
AND……………Ta Da!!!
As a special unannounced prize to celebrate our new digital images…………
Bonus Winner
Blessings From Cindy
Your choice of any 2 digital images
Thanks again for joining us and stay tuned for the next blog hop!  It’s not too far away.

Wednesday, July 11, 2012

Sparkle N Sprinkle Christmas in July Blog Hop

Hi and welcome to the Sparkle N Sprinkle Christmas in July blog hop that runs from July 12th  - July 13th. It has been sweltering in much of the US lately so hopefully this hop will help you cool down a bit! If you have come here by way of Karalee's wonderful blog, then you are in the right place. If not, you might want to start at the Sparkle N Sprinkle blog to be eligible for the FIVE prizes we are giving away! First of all I want to show you a card I made with our brand new release set -- Woofie. Isn't he cute? I made the sleigh by cutting a wavy line across the Spellbinders labels 8 die. The blades of the sleigh were made by using the antlers from a reindeer die!


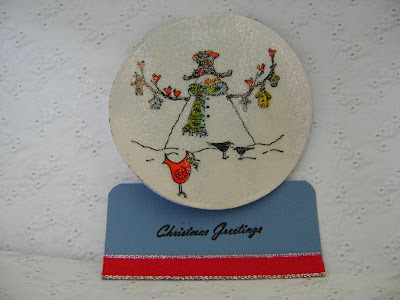
When I was young I just loved snow globes and I still do. I had several of them over the years. I decided to make this card a snow globe. I used a snowman from the Merry Crows set.


I used another snowman from this same set on this card. To make a frosty look, I used a used dryer sheet over the snowman that I ran through the Xyron machine and rubbed Waterscape glitter over it for sparkle.


Now for my last card! I used the ornaments from the Nesties Ornaments set. The Spellbinders Heirloom Ornaments dies fit with this set for an easy cut.


Just a reminder that through the end of the month, the Sparkle Team presents all the Christmas & Winter, Jewish & Christian images on special – 15% off!  To view all our specials, which also include a few glitters, embossing powders and flocking – just click here.    http://sparklensprinkle.com/o/specials.php

Would you like to be a part of this fabulous design team???   We have a Design Call out thru July 27th!   See the detailsHERE.

Remember to go to each design team member to leave a comment. Thanks for stopping by! Now on to the
talented JILL'S blog!

Monday, July 9, 2012

Technique Tuesday -- Swirled Acrylics


Wow, it's time for the Sparkle N Sprinkle Technique Tuesday again!  I just got back from The Scrapbook Expo with Margaret.  Marie and I had a wonderful time getting to know Margaret and interacting with the customers at the show. What I want to show you today is a technique I call Swirled Acrylics. This is easy and fun and makes a nice textured background.


Supplies needed:
  1. 3 colors of acrylic paints
  2. plastic plate
  3. paint brush
  4. white cardstock
Take the 3 colors of acrylic paint and squeeze out a small puddle of each color onto the plastic plate.


Use the end of a paint brush to swirl the colors as you turn the plate with your other hand.


Place the cardstock on the paint and pat lightly with your fingers, then lift off. The colors will not be in a circle, but you will see the various colors have not muddled, but have made an interesting pattern.


This is the background I used on my card and here are some other backgrounds I made.


Thanks for stopping by. I hope you enjoy trying this easy technique. Have a blessed day!

APRIL

Sparkle N Sprinkle supplies used:
  1. Blue Jewel glitter
  2. Pretty Princess glitter
  3. Fancy Butterfly
  4. Hello

Sunday, July 8, 2012

Scrapbook Expo

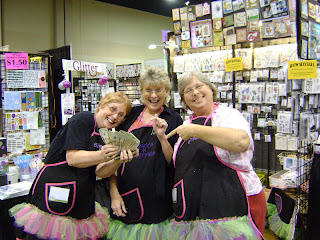
Hi Everyone! I have been AWOL for a few days because I have been helping at my design team's booth ( Sparkle N Sprinkle) at the Scrapbook Expo in Duluth , Ga! It was fun to meet our wonderful leader, Margaret, and to spend time with her this weekend. The show was busy and a great success! My dear stamping friend and fellow designer, Marie, went with me. It was fun to see our stamping friends from home there also! Here are some pictures from the show!

 Setting up the booth.

 Having fun.
 Marie demoing.
 So tired after the show.
A great success!

Wednesday, July 4, 2012

12 Tags of 2012 -- July

My tag is not patriotic, but I wish you a Happy Independence day anyway! On Tim Holtz's blog he is showing how to make a splash using canned air. I just love this technique because it always makes a wonderful background. Click here to see this fun technique. I made my flower by rubbing Distress inks on book pages and spritzing with water to blend. I then used a scalloped heart punch and punched out "petals", layered them and sewed a button in the middle. Thanks for stopping by and have a fun and safe holiday!


Tuesday, July 3, 2012

Technique Tuesday -- Watercolor on Canvas


Hi! It's Technique Tuesday at Sparkle N Sprinkle! Has everyone been scorching like I have lately? I hope you are keeping cool and I hope you have a wonderful and safe 4th!  My technique today is watercolor on canvas! I just purchased some sticky back canvas and had to give this a go.


Supplies:
  1. canvas -- I used sticky back canvas
  2. die ink pads
  3. permanent black ink pad
  4. water pen or brush and water
  5. water spritzer
  6. stamps
  7. craft sheet
  8. markers -- I used Tombow
First I went around my canvas piece with the sew easy tool. If you want a sewing look this is one way to show stitching. I then connected the dots using a fine point permanent black felt tip pen.


Next stamp your images on the canvas  using permanent black ink.


Using the water spritzer, spritz the canvas with water until it is pretty wet.


Now take one color of ink pad and pat onto your craft sheet and pick up color with a wet brush or water pen and start to color your images.


After coloring, let the canvas dry. You can also use your heat gun to help it dry faster. The colors will look a little faded at this point.


Take your markers and color in areas to shade and make darker.


I used a saying stamp and lightly stamped it several times across the piece to add some interest and then I added glitter to make it sparkle! I hope you have enjoyed the technique today. Thanks for stopping by! Have a wonderful day!

April

Sparkle N Sprinkle supplies used:
  1. Swirl Butterfly sm. 3544-437H
  2. Pansies 1692-327K
  3. Waterscape glitter G1108

Blog Archive